3D Feather Layered Design
Adding depth and texture to your craft projects can transform a simple silhouette into a stunning piece of art. The 3D Feather Layered Design offers a sophisticated way to achieve this effect without requiring advanced artistic skills or expensive materials. By utilizing overlapping layers, this design creates an illusion of volume, making it perfect for everything from elegant wedding invitations to rustic home decor accents. Whether you are a seasoned pro with a Cricut or Silhouette machine or just starting your crafting journey, understanding how to leverage layered files can significantly elevate the quality of your creations.
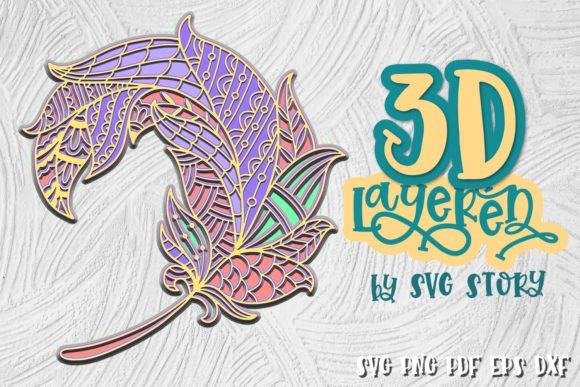
This specific design is not just a flat image; it is a carefully constructed vector file that allows you to cut multiple pieces of material in varying sizes. When these pieces are stacked and adhered together, they form a cohesive, three-dimensional feather shape. This technique is particularly popular because feathers symbolize lightness, freedom, and elegance, making them versatile motifs for various themes and occasions.
What Makes Layered Designs Special?
At its core, a layered design relies on the principle of scale and contrast. Instead of cutting out a single solid shape, you cut several versions of the same motif, each slightly smaller than the last. By arranging these shapes from largest to smallest and using contrasting colors or textures, you create visual interest and depth. The 3D Feather Layered Design takes this concept and applies it to the organic curves of a feather, resulting in a look that is both delicate and bold.
The beauty of this approach lies in its flexibility. You are not limited to two or three layers. Depending on the complexity of the file and the size of your project, you can add more layers to increase the dimensionality. For instance, a large wall hanging might benefit from five or six layers to maintain visibility from a distance, while a small gift tag might only need two or three layers to keep the detail sharp and legible. This adaptability makes the design suitable for a wide range of scales and applications.
File Formats and Compatibility
One of the most significant advantages of purchasing digital cut files is the variety of formats available to suit different software and hardware needs. The 3D Feather Layered Design comes complete with a comprehensive package including SVG Files, EPS Files, DXF Files, and PNG Files. Each format serves a specific purpose:
- SVG (Scalable Vector Graphics): Ideal for use with modern cutting machines like Cricut and Silhouette. SVGs are resolution-independent, meaning you can resize them without losing quality. They are also easy to edit in design software if you want to adjust spacing or colors before cutting.
- EPS (Encapsulated PostScript): A robust vector format often used in professional graphic design programs like Adobe Illustrator. This format is excellent for high-precision editing and is widely supported by commercial plotting machines.
- DXF (Drawing Exchange Format): Another vector standard commonly used in CAD software and some cutting machines. It is a reliable option for users who prefer working with technical drafting tools or specific brand-specific software.
- PNG (Portable Network Graphics): A raster image format that includes transparency. While not a cut file itself, PNGs are useful for printing directly onto paper or cardstock, or for using as reference images when creating custom designs in other software.
All files are archived in a convenient zip format. Before you begin your project, ensure that your computer has the necessary software installed to open and manipulate these files. Most cutting machine companion apps support SVGs natively, while EPS and DXF files may require additional import steps or compatible desktop software.
How It Works and Cutting Tips
The workflow for using the 3D Feather Layered Design is straightforward but requires attention to detail to achieve the best results. Since the design features original, hand-drawn elements that have been perfected for smooth cutting, the paths are clean and precise. However, proper preparation is key. First, uncompress the zip file to access all the individual layers. In your design software, arrange the layers so that the largest feather base is at the bottom and the smallest tip is at the top.
When setting up your cutting mat, consider the material you are using. Cardstock is a popular choice for its stiffness and ability to hold shape, but felt, vinyl, and even thin wood veneer can work well depending on the thickness of your blade settings. Ensure that the layers are aligned correctly in your software before sending the job to your machine. Some users find it helpful to cut each layer color separately to avoid confusion during assembly. Once all pieces are cut, gently remove them from the mat and begin stacking from the largest to the smallest layer, securing them with double-sided tape or strong adhesive dots.
Practical Applications and Use Cases
The versatility of this design opens up numerous creative possibilities. For educators and students, it serves as an excellent tool for teaching concepts of geometry, symmetry, and spatial reasoning through hands-on activities. Hobbyists might use the design to create unique scrapbook pages, journaling cards, or personalized stationery. The aesthetic appeal of the 3D feather makes it a favorite for seasonal decorations, such as autumn-themed displays where natural tones like browns, oranges, and golds are prominent.
Entrepreneurs and small business owners can incorporate this design into their product lines. Imagine selling handmade jewelry featuring layered feather pendants, or offering custom nursery decor items like mobiles and wall art. Marketers might use the design for branded giveaways, such as custom bookmarks or promotional tags attached to gift boxes. The professional finish achievable with this cut file helps enhance brand perception, signaling quality and care in every product.
Important Considerations Before You Start
While the 3D Feather Layered Design is user-friendly, there are a few things to keep in mind to ensure success. First, always test your cuts on a small sample of your chosen material. Different brands and types of paper or fabric may react differently to blade pressure and speed. Adjusting your machine’s settings based on this test will prevent wasted material and frustration.
Additionally, consider the final display environment. If the feather is intended for outdoor use, ensure that the materials and adhesives are weather-resistant. For indoor projects, lighting can dramatically affect how the layers appear; natural light often enhances the shadows and depth created by the overlapping pieces. Finally, remember that all designs are © SVGStory. Respect intellectual property rights by using the files for personal projects or according to the specified commercial license if applicable. If you have any special formats you need beyond what is included, do not hesitate to contact the creators for assistance.
In summary, the 3D Feather Layered Design provides a blend of artistic flair and technical precision that appeals to a broad audience. Its compatibility with major cutting formats, combined with its timeless aesthetic, makes it a valuable addition to any crafter’s library. By following the provided guidelines and experimenting with different materials, you can create beautiful, dimensional pieces that stand out in any setting.