Mastering the Art of 3D Laser Engrave Lily for Stunning Wood Crafts
For hobbyists, small business owners, and creative artisans who utilize laser engraving technology, the quest for high-quality, versatile designs is never-ending. One design that has gained significant traction in the crafting community is the 3D Laser Engrave Lily. This isn't just a simple graphic; it is a meticulously prepared digital asset designed to maximize the depth, contrast, and detail achievable on various materials, particularly wood. Whether you are looking to create personalized home decor, unique gifts, or professional-grade stationery, understanding how to leverage this specific PNG file can transform your output from basic etchings into rich, textured artwork.
The core value of the 3D Laser Engrave Lily lies in its preparation. Unlike standard vector files that rely solely on line work, this product comes as a high-resolution grayscale image. This distinction is crucial because laser engravers, such as those from Glowforge or xTool, interpret grayscale values differently than they do solid black vectors. By using a grayscale image, you allow the laser to modulate its power across the surface, creating varying depths and shades that mimic a true photograph or painting. This results in a "3D" effect where light and shadow interact with the grain of the wood, giving the lily design a lifelike presence.
Understanding the Product Specifications
Before diving into the technical setup, it is essential to understand what you are working with. The 3D Laser Engrave Lily package is comprehensive, ensuring that users have all the necessary tools for different material types and aesthetic preferences. Upon purchase, you receive a zipped folder containing 531 MB of data, which includes:
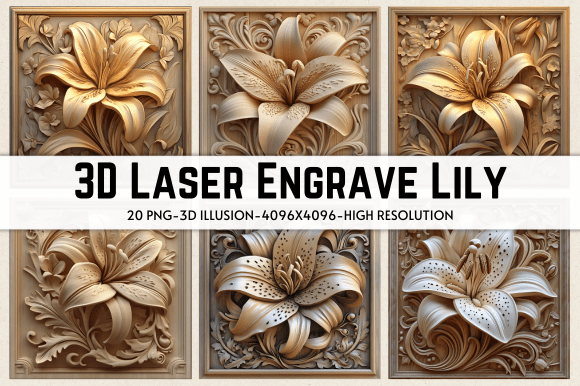
- 20 Coloring PNG Files: These are ideal for users who want to add vibrant hues or specific color palettes to their designs before engraving, or for use in mixed-media projects.
- 20 Grayscale PNG Files: These are the primary assets for laser engraving. They are optimized to translate directly into laser power variations, creating the signature 3D depth effect.
- High Resolution: Each file is sized at 13 x 13 inches (4096 x 4096 pixels). This resolution is critical because it ensures that fine details of the lily petals and leaves remain sharp, even when scaled down or engraved on smaller items like jewelry boxes or keychains.
- Transparent Backgrounds: Every PNG file features a transparent background, allowing you to easily layer the lily design over other elements or place it precisely within your cutting software without unwanted white borders.
This variety allows creators to experiment. For instance, if you are working with a dark hardwood like walnut, the grayscale files will pop beautifully against the deep tones. Conversely, if you are using lighter woods like maple or birch, the same files can be adjusted to highlight the natural beauty of the grain while still delivering intricate detail.
Technical Setup for Optimal Results
One of the biggest challenges users face with 3D Laser Engrave Lily is not the design itself, but the machine settings. A poorly calibrated laser will turn a beautiful grayscale image into a muddy, low-contrast mess. Therefore, getting your software and hardware aligned is the most important step in the process. Below are recommended starting points for two of the most popular laser engraving ecosystems: Glowforge and LightBurn.
Settings for Glowforge Users
Glowforge machines are known for their ease of use, but achieving true 3D depth requires specific adjustments. When uploading your 3D Laser Engrave Lily grayscale file, follow these guidelines:
- Speed: Set to 1000. This moderate speed allows the laser to deposit enough heat to char the wood deeply without burning through thin areas.
- Power: Set to 90%. High power is necessary for the darker parts of the grayscale image to create significant depth.
- Mode: Select "Grayscale - Vary Power." This is non-negotiable. It tells the machine to read the pixel brightness and adjust the laser intensity accordingly.
- Quality: Choose "Max Quality."
- Lines Per Inch (LPI): Start at 270. If you find the image looks too blocky or pixelated, you can increase this number slightly, though 270 is generally optimal for the 4096px resolution provided.
- Passes: Keep this at 1. Multiple passes can sometimes blur the fine details of the lily petals.
- No Masking: Ensure masking is turned off so the entire area defined by the grayscale values is engraved.
Lighter woods are highly recommended for this setting, as they provide a clean canvas that contrasts well with the charred lines of the engraving.
Settings for LightBurn Users
If you are using LightBurn, you have more granular control over the dithering algorithm. The 3D Laser Engrave Lily files are pre-dithered using a Jarvis dither filter, which is excellent for maintaining smooth gradients. However, you may need to tweak the intensity based on your specific laser tube’s strength.
In LightBurn, ensure your material type is set correctly. Use the "Engrave" mode rather than "Cut." You should import the grayscale PNG and verify that the "Color Mode" is set to Grayscale. If the result appears too faint, increase the power incrementally. If it appears too burnt, reduce the power or increase the speed. The goal is to balance the depth of the engraving with the preservation of the wood's structural integrity.
Practical Applications and Creative Ideas
Once you have mastered the technical aspects, the possibilities with the 3D Laser Engrave Lily expand significantly. Because the design is available in both coloring and grayscale formats, it serves multiple practical applications:
- Home Decor: Create large wall art pieces by engraving the lily onto plywood panels. The 3D effect adds texture that catches ambient light, making the flowers appear to bloom off the wall.
- Wood Crafting: Use the files for smaller items like cutting boards, serving trays, or picture frames. The 13x13 inch size can be cropped to fit perfectly on the corner of a tray, adding a touch of elegance.
- Stationery and Packaging: While primarily a digital file, the high-resolution nature of the 3D Laser Engrave Lily makes it suitable for embossing or debossing thick cardstock if you have a compatible attachment, or for creating custom wooden tags for gift wrapping.
- Textile Integration: Although designed for wood, the transparency of the PNG allows designers to overlay the lily pattern onto fabric designs digitally before printing, or to use the laser-engraved wood as a stamp for textile patterns.
Considerations for Success
To get the best outcomes, always test your settings on a scrap piece of the same wood you plan to use. Different wood densities absorb laser energy differently. A setting that works perfectly on pine might burn too aggressively on oak. Additionally, keep your lens clean. Dust and debris on the laser lens can scatter the beam, reducing the precision needed for the delicate details of the lily design.
Furthermore, consider the finish of your project. After engraving, applying a clear coat, oil, or wax can enhance the contrast. Oils tend to darken the wood, which can make the lighter gray areas of the engraving stand out more vividly. This post-processing step can elevate a good engraving into a professional masterpiece.
In conclusion, the 3D Laser Engrave Lily is more than just a downloadable file; it is a tool that empowers creators to explore the full potential of their laser engraving machines. By providing high-resolution grayscale assets tailored for specific software like Glowforge and LightBurn, it removes the guesswork from achieving realistic textures. Whether you are a seasoned pro or a beginner eager to learn, this resource offers a straightforward path to producing stunning, detailed wood crafts that capture the natural beauty of the lily flower.